The First Use of Annie Sloan Chalk Paint

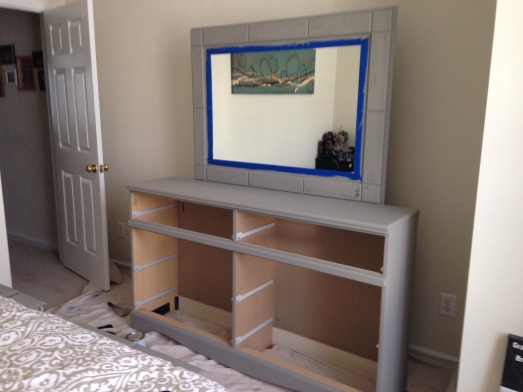
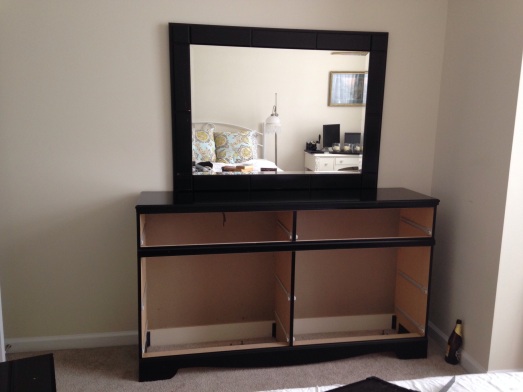
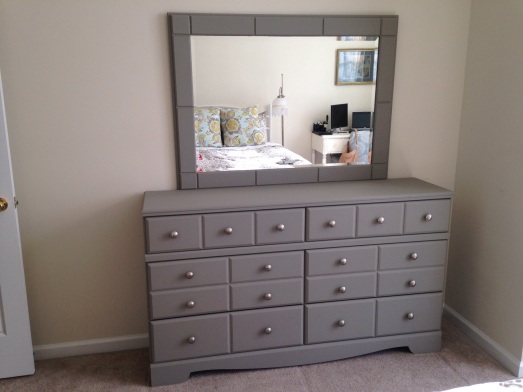
One of my plans to save money for our house was to re-allocate furniture. My boyfriend had a beautiful bedroom set, but it was a black laminate. It went perfectly with his decor, but black just didn’t incorporate into our (read: my ;)) bedroom plans. Since we (I) wanted to use my white dresser and lingerie chest for our bedroom I planned out how to put one of his two dressers and nightstands into each guest room. Since black still wasn’t in the plans I decided to use Annie Sloan chalk paint since it’s supposed to cover laminate surfaces and without any sanding! That’s what sold me, even with the exorbitant price. For the dresser pictured I used French Linen. I aaaaaalmost got everything covered but I only got one coat on one side if the nightstand.

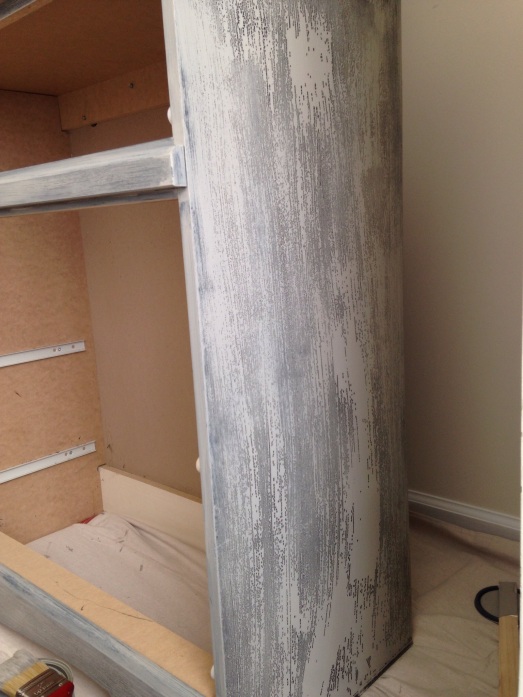
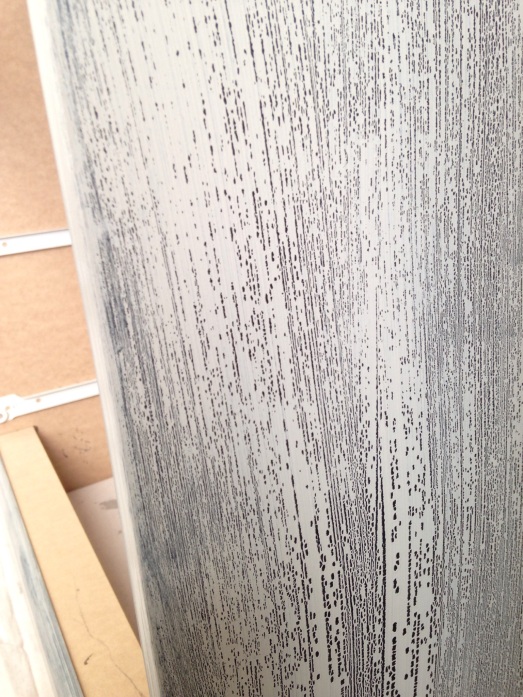
My boyfriend started on one dresser while I was at work one day and the results freaked both of us out as the paint kept beading together. I was worried we were SOL and had wasted money on it, but he kept on and luckily it worked out for us. I was mostly surprised that with all the articles I read I hadn’t come across this in any of them, though! So I decided to depict my process with the chalk paint so people can be prepared.

The start, drawers pulled out
IMG_1174.JPG

First coat
IMG_1171.JPG

Close-up first coat
IMG_1180.JPG

Second coat
IMG_1175.JPG

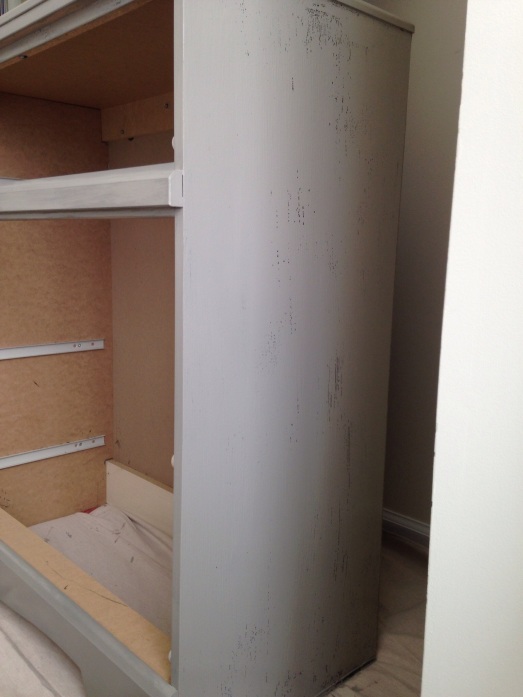
After three coats on the base (mirror has two) plus a few touches here and there
IMG_1184.JPG

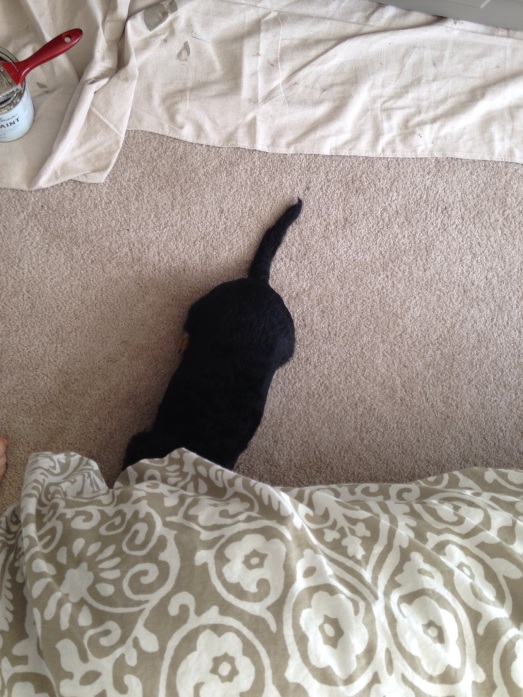
The pup looking for his kitty sister so he can antagonize her 🙂
IMG_1187.JPG

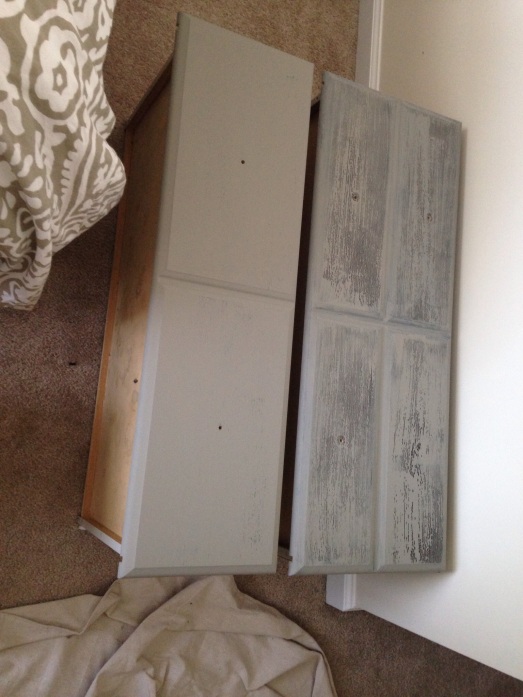
Some more examples via the drawers. One coat vs two
IMG_1185.JPG

The final product
IMG_1190.JPG

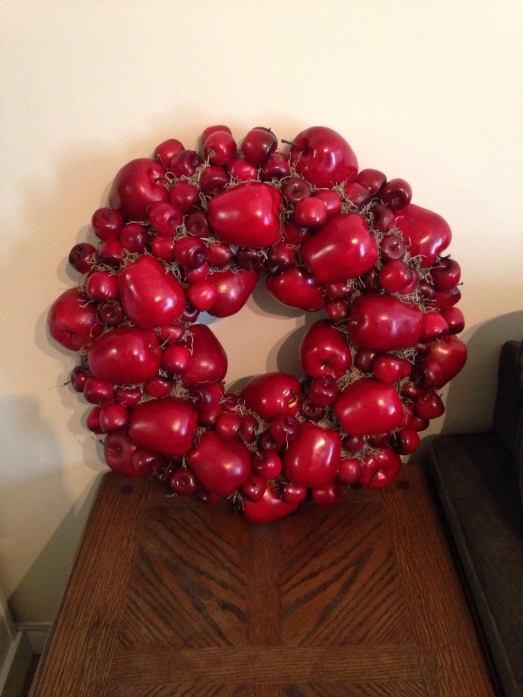
The Million Dollar Wreath

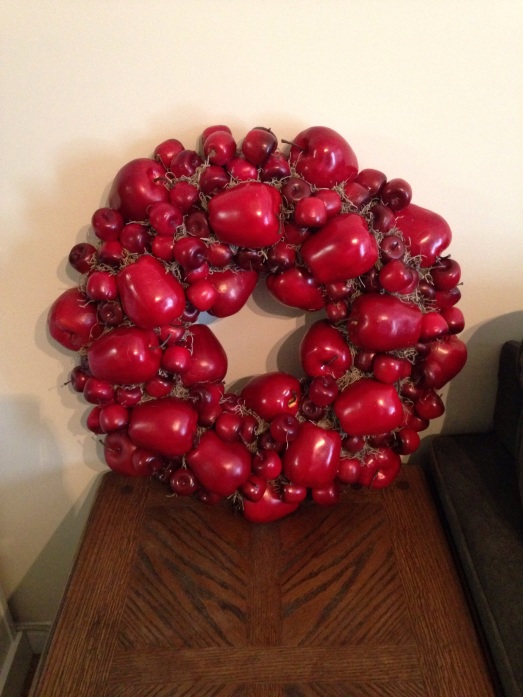
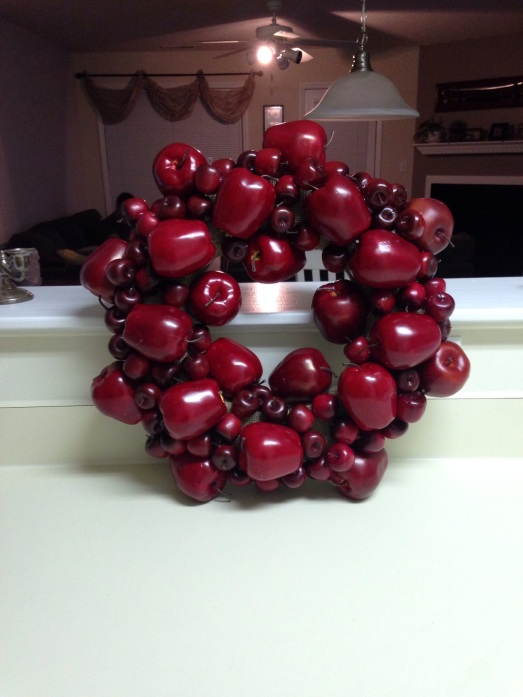
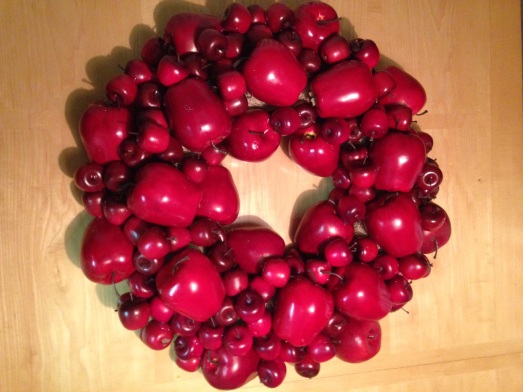
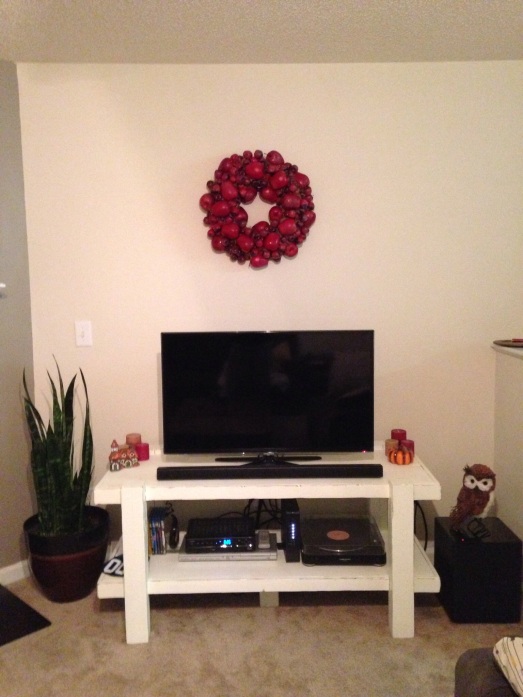
I made this wreath simply because it was so beautiful and I just needed it. We don’t necessarily need a wreath for our door, but I used the excuse that we should have one. BUT unless you have a big chunk of extra change to spend or an “in” somewhere with cheap fake apples, I encourage you not to make this. It cost me roughly $150 – and that was $150 I did not really have to put towards this! But I was too deep in and would have wasted the money already spent if I just stopped. My boyfriend is not the hugest fan of this wreath, and he is the one who dubbed it The Million Dollar Wreath since it felt like every two days I would announce that I was out of apples and needed more. HOWEVER it’s absolutely gorgeous and turned out so well we decided to hang it over our TV in the space we’ve been trying to fill! Now we’ll be able to get $150 worth of enjoyment and viewing pleasure 🙂

IMG_1251-0.JPG

Things You Need
– 4 bags big apples plus 2 additional singular big apples
– 6 bags small apples
– 11 inch flat foam wreath
– Burlap ribbon
– Fake grass/moss
– Lots of hot glue sticks

Directions
1. Cut some burlap into roughly 8 inch long strips. The length doesn’t matter very much, you just want it have enough to warp around the styrofoam wreath a few times.
2. Glue your burlap onto the wreath. When you wrap make sure it’s tight and flat. The purpose of this is so your apples have something to adhere to when you glue them on. Make sure every spot is covered, I even wrapped it with two layers to be sure it was good to go.
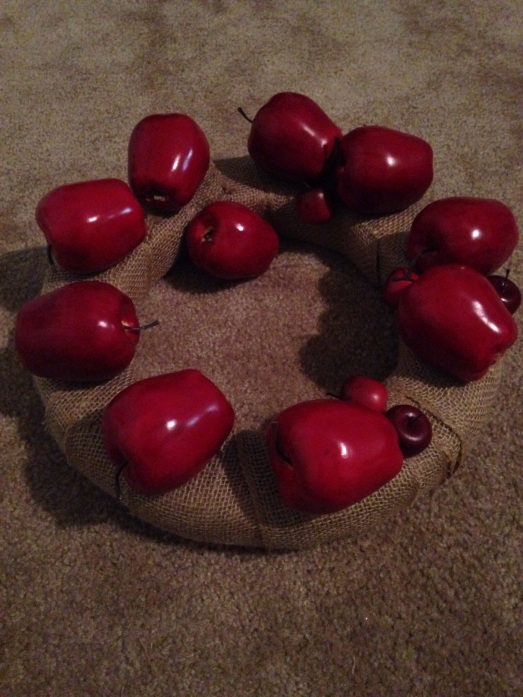
3. Break out your apples! I started with my big ones and placed them around on the wreath first to eyeball how I liked them, then started gluing.

IMG_1202-0.JPG
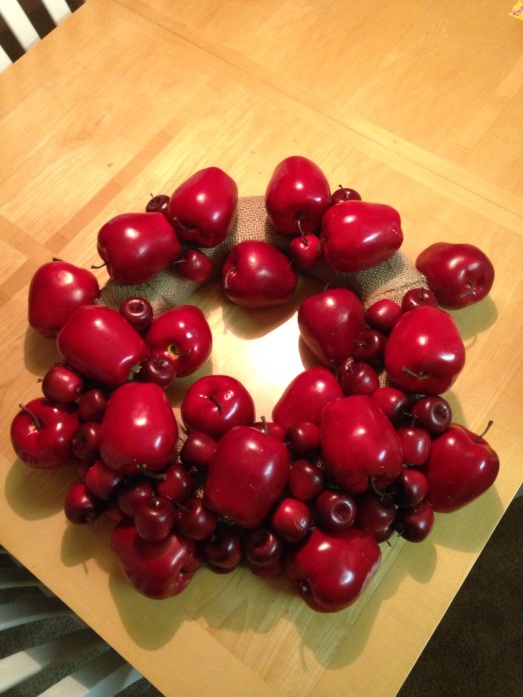
4. Keep gluing all your big ones, and then start adding your small apples. In the picture below I was 2 big apples short of having the outer ring completed so I started the small ones on the completed side.
IMG_1217.JPG
IMG_1215.JPG
6. Once you’ve covered all the burlap around the wreath start building it up. With some dimension it should look very circular rather than awkwardly wavy.
IMG_1250.JPG
6. The last thing you will do is stick the fake grass/moss into the holes. This was pretty tedious and because I’m somewhat of a perfectionist I meticulously went around the wreath and shoved moss in every.single.hole. The way I made sure the moss got attached was pretty simple – I would push or aim the nozzle of my hot glue gun into the hole and then shove the moss down in there. Sometimes I had to use some tools to help me shove it in when the hole was smaller than my finger. Pretty tedious, but the result makes it look much fuller and thoroughly perfected! Plus expensive.
IMG_1251-1.JPG
7. Before we hang it I’m going to blast it with my blow dryer to get some of the loose moss and hot glue, and then I’m going to do a quick spray with some clear spray just to keep everything set!
IMG_1305.JPG

The Entertainment Center

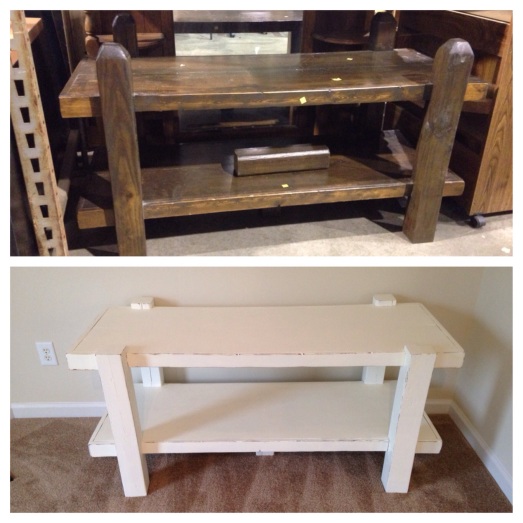
We had some very big purchases we had to make for the new place (couches, washer dryer, mattress..) and buying a big entertainment center was not in the budget. We went to the home of some friends one night for some drinks and I lOvEd the way they decorated their home. Their entertainment center was exactly what we needed in our space, and they mentioned they had gotten it at the Habitat for Humanity Restore, which I’d never heard of before! So I looked it up online and there is one not 10 minutes away! I love Raleigh <3. So I popped over and found a big beast that I knew could be turned into a beauty. It was only $35, too! So I hauled it home and it cluttered up my teeny tiny townhouse for weeks until we brought it out to my boyfriend’s house and did the work in his garage.

At the store!

At the store!

1. The first thing I did was cut off the awful turret like stumps. This was difficult because we only had a small jigsaw. A longer blade Sawzall would have been much better, but we don’t have one…yet! 😉 I had to cut around the edges and jiggle things along to get in. This resulted in uneven cuts on the stumps.
2. Since the stump tops weren’t level I had to break out the belt sander. I tried with the palm sander but that was VERY slow going. I sanded until it looked level and then my boyfriend’s best friend checked it and it was pretty much spot on. I’m awesome, don’t worry.
3. Then I switched back to the palm sander and got going on the surfaces of the table. It didn’t need to be perfect as I knew my Zinsser 1-2-3 primer/sealer would be great. I used that on the table and chairs I did so I knew it would cover everything. I went through 2 cans of the spray paint cover.

Sanded

Sanded

Primed

Primed

4. I painted it with some leftover paint I had from when I previously refurbished my dresser, I used a small roller I had and some tiny brushes for the crevices.
5. Then I went out and bought some sanding blocks to distress it. I bought medium so I didn’t totally ruin it, but that was a mistake. I should have done more research, maybe I should have used steel wool, because it was super tedious and difficult and I gave up after only distressing the edges.

IMG_0969.JPG
6. We needed to poly it since it would have a bunch of equipment on it. Unfortunately, the poly we used turned it yellow in some places! That was a huge bummer after all the work! But it wasn’t bad and we were lucky it was mostly yellow on the back.
 

BONUS PICS!
While I was working on the entertainment center my man was working on the headboard he built for me! He did everything himself!

Sanding!

Sanding!

Stained!

Stained!

Final beautiful product, complete with kitty :)

Final beautiful product, complete with kitty 🙂

The Pine Cone Method

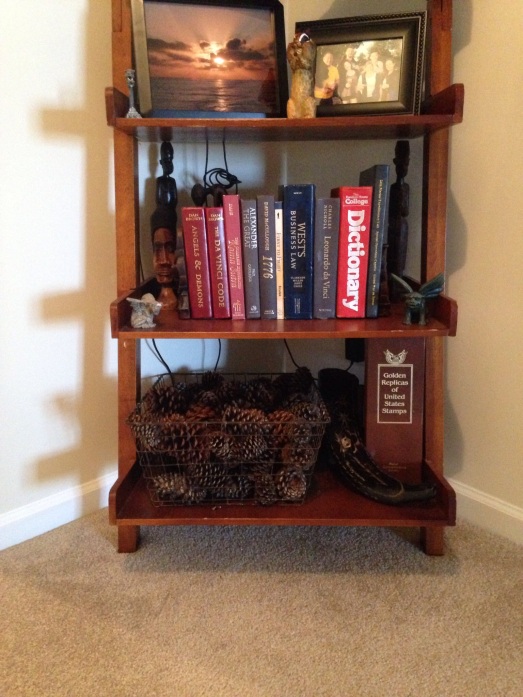
Hi everyone! Sorry for the long delay!! It’s been a pretty crazy few months. My Marine is no longer my Marine, he’s now my civilian! And he’s also my roommate! We moved in together a few weeks ago and have been crazy with making the place our own. One of the items on my never-ending list of things to do to get this place complete is to fill a wire basket on a tiered shelf in our hallway with pinecones! I bought some scented ones but 1. They can be expensive and 2. He didn’t want to be living in a house that smelled overbearingly of cinnamon so I decided to mix the scented pinecones with some I found out in the forest near our house and spray paint them gold for a nice effect. Cheap and effective! So we went out with my new fur baby, his little wirey haired dauschund, Alfie. We picked up a bunch of pine cones, but we’ve had a lot of rain over the past week so they were very wet. When I got home I followed the following instructions.

Directions
1. Collect your pine cones.
2. Preheat the oven to 200 degrees.
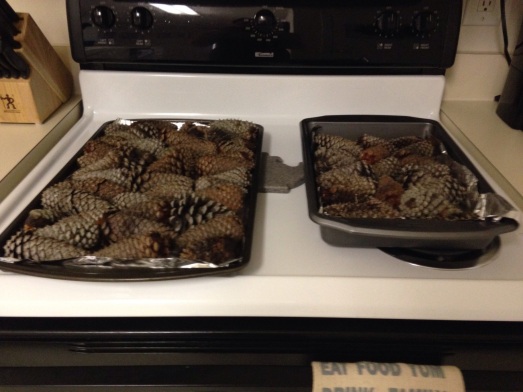
3. Arrange the cones on a baking sheet in a single layer, don’t overcrowd if the cones are very wet or tightly closed.

IMG_1126-0.JPG
3. Bake the cones for 20-25 minutes really just bake them until they are open. For me it took like 80 minutes for them to open! The wet-er they are the tighter the pine cones close, so it will take longer.
4. After they’re open and done baking it’s good to spray them with some clear coat spray paint to give them some support as they’re pretty fragile.

IMG_1154.JPG

The Pots and Pans!

My boyfriend and I live a little while apart from each other and on the way there is a big red barn with lots of…well really lots of junk out front. It’s an antique store out in the middle of the country, and that is waaaay up my alley. My boyfriend and I went last weekend to do some furniture shopping, mostly browse, but we were blown away with the quality of the stuff they had when we walked in. The inside was way different than what they had sitting out front! Unfortunately we didn’t find any furniture to take with us, but when I went into the knick-knack room I found a cast iron dutch over and then a maaaasive skillet. Both are huge but were in pretty crappy condition. But I was not deterred because I had seen a how-to site recently (http://www.ibelieveicanfry.com/2010/12/reconditioning-re-seasoning-cast-iron.html) and it really didn’t look too hard. I got some flack and skepticism for purchasing them in that state, but I knew I’d show everyone!

Items needed:
– Heavy duty oven cleaner
– Gloves
– Steel wool
– Garbage bags
– White vinegar
– Lard

Directions
1. Take your cast iron items and cover completely in the over cleaner. You definitely need to wear gloves during this part, oven cleaner will burn your skin. I ignored it at the very end because I just wanted to get the bag tied up – oh, man. That was a mistake. I burned the crap out of my hands, they were dried and peeling for days.

How they looked at purchase

How they looked at purchase

2

Original inside of the skillet

Original bottom

Original bottom

Dutch oven before - notice the massive discoloration of the lid and pot

Dutch oven before – notice the massive discoloration of the lid and pot

2. Once the item is coated, put it in the garbage bag and seal tightly. The oven cleaner starts working immediately!! I kept them in my dining area because I don’t have a garage and I didn’t want to leave them outside on my balcony for fear of rusting or doing more damage to it in the southern humidity. The site recommends leaving them in the bag for 2-3 or a week for super grimy items.

Oven cleaner doing its job!

Oven cleaner doing its job!

6
3. I left them in the bag for 3 days. Then I removed them, cleaned them off with warm water (this was super gross but sooooo awesome seeing the change), and dried off with paper towels. They all needed another couple days of soaking so I reapplied the oven cleaner, put them back in the garbage bags, and let them sit for another 2 days.

The difference on the pot after the first round, halfway cleaned.

The difference on the pot after the first round, halfway cleaned.

Lid after the first round, still some rust. About to be coated again.

Lid after the first round, still some rust. About to be coated again.

4. Once they were ready I took them out again, cleaned them off with warm water, wiped them off with paper towels, and put them in a bin to soak in a bath of water and white distilled vinegar, 2:1 water to vinegar. The site recommends leaving them in for 30-60 minutes and I left each in for 60 minutes.
5. Preheat your oven to 250 degrees F so it’s ready to go immediately.

This is the skillet, I wrapped the handle in wet paper towels so it wouldn't rust.

This is the skillet, I wrapped the handle in wet paper towels so it wouldn’t rust.

6. This is the hard but fun part. When you take it out of the soak, it’s time to scrub with the steel wool. Scrub every inch of it! This takes some time and isn’t very easy to do. I tried to keep it wet at all times because I could see some rust beginning. Once you’re sure you’ve scrubbed it perfectly then clean it with soap and water, dry it off, and transfer immediately to the pre-heated oven. Make sure it’s upside down!

After the steel wool scrub down. I cannot emphasize how annoying those spikes were to clean.

After the steel wool scrub down. I cannot emphasize how annoying those spikes were to clean.

After the steel wool scrub down.

After the steel wool scrub down.

7. Bake the item at 250 for 15 minutes then increase to 500 and bake for 45 minutes more. Then turn off the oven and remove the item. Coat with lard, I dipped a paper towel into the lard and then coated it on. It’s ok if smokes a little when you do it the first time. With a clean paper towel wipe off any excess. This step smells super bad. As my boyfriend put it “vomit inducing bad.” I don’t think it was thaaaat bad, but it’s sure not pleasant.

First coating of lard.

First coating of lard.

Now return to the oven, always upside-down so the lard doesn’t pool in the bottom. Every 10-15 minutes wipe off excess, and every 30 minutes do a new coating of lard. After an hour open the door for a few minutes to finish cooling the oven.
8. Now it should be done!!

Done!

Done!

15-1

19

I couldn’t get a few flecks off no matter how hard I scrubbed, but it’s the bottom so I wasn’t too bothered.

14-1I did make one major mistake and that was try to do two pieces at the same time without realizing the baking steps. Since the oven needs to cool with the cast iron item, you can’t do the second with a cold oven and can’t cool the first with a hot one! But I was stuck since the second was already soaking, so I decided I’d have to wing it. I did the skillet first, and as you can see there is some color variation on the bottom and on the inside. It’s not much of a problem for me really since it’s not super bad, but it’s a lesson to learn from!

17
18

20
21

Added this one to show the color without any reflection from the table.

Added this one to show the color without any reflection from the table.

The Mother’s Day Gift

I’ve been really wanting to get back into some projects rather than just recipes (btw, made a baller cilantro citrus BBQ pork chop dinner recently!) but haven’t had the need to actually make anything. And I sure don’t have the room to keep unnecessary items in my home! But I came across something that seemed perfect, a hanging basket made by one of the DIY bloggers I follow on Facebook, http://www.addicted2decorating.com/easy-inexpensive-diy-pieced-wood-hanging-flower-basket.html. It would make the perfect Mother’s Day gift! I kind of want to make one for myself, this was super fun to do!! And it only came out to be around $20 and only 3 hours of time total.

Materials Needed:
• 8 or 10 ft 2×4 KB Note: depending on how big you want to make the diameter you will need more pieces
• 3/4″ or 1″ brad nails (depending on the gauge of your nail gun)
• Wood glue
• 2 Screw eyes
• 2 S hooks
• Chain (I got 2 ft)
• Coco liner
• Circle saw
• Nail gun
• Palm sander
Optional
• Spray paint (2 cans)
• Sealant

Instructions
1. If you are using an 8 ft 2×4 cut the entire piece into 1/2 inch thick pieces.

photo 2

The contraption my friend rigged up to keep things moving fast.

The directions I used said she used 137 pieces, but I used more than that due to my diameter.
photo 1
If you’re using a 10 ft then go with probably 160 pieces. I don’t know how many I ended up with as my friend who did the cutting just went for it after we hit 140. I’m glad he did, though, because I only had 2 pieces left over!
2. Lightly sand all the edges of the 1/2 pieces. I used my palm sander and thank goodness I did because this was super tedious.

This part was not fun.

This part was not fun.


3. This is where it got kind of tricky for me. I didn’t have any kind of radius to trace, nor any kind of platform to use. SO I used some redneck logic. I used my patio, created a center point, and instead of going with the original direction’s radius 19 inches I went with 20 so that it would be 10 on each side of my center point. I then placed a “wood chip” on the ground 10 inches on either side of the center point, and then did the same thing on the other side forming a compass like shape and repeated between those 4 pieces. I eyeballed it for the most part honestly. I used 12 on the first row.
photo 4
4. On the second row I used 11 wood chips since you’re creating a step effect. I first checked and did a dry run of the placement by placing them evenly on top of the first row. Once I had the right idea I put wood glue on each edge and then used my nail gun and 1 inch brad nails and nailed each side as well.
photo 1 (1)
5. Even though I used more wood chips than Kristi did on hers I followed her plan and did the same method and covered the levels evenly until the fifth row, using 1 less wood chip on each level. Always using wood glue and brad nails on each side.
6. On the fifth row I followed her directions and started to create the basket by moving the bottom wood chips so that they covered only half the wood chip below it. On the fifth row I only did this with three of the wood chips, the bottom center piece and the piece on either side of it. On the sixth row I then moved it up so that it was the center piece and two pieces on either side.
photo 2 (2)
7. I continued to do the half-cover method until I realized my wood chips were dwindling fast and I still had another half side to do! Conveniently my wood chips were starting to touch at the corners as the angle was getting smaller and I thought it was a good spot to stop the basket effect. At the end I did 8 levels on each side.
8. I then flipped it over and started on the other side, following the same methods as the first side. I put some extra 2x4s I had under the top of the basket handle to add some stability. Be careful if your surface isn’t level when nailing the pieces at the bottom of the basket as it might rock and mess up your shot with the nail gun.
9. Once that’s done, marvel at it for a while! It’s pretty cool!
photo 3 (1)
photo 4 (1)
photo 5 (1)
10. Then drill some pilot holes at the top for the eye hooks, and screw them in and attach the chain with the S hooks.
11. I wanted to add some color and cover the weird yellow tint of the 2×4 and spray painted a color that would go with my parents’ house. I didn’t seal it because…I’m cheap and this needed to stay under $20. I sprayed the crap out of this thing to make sure all the nooks and crannies were covered. Place your coco liner in the bottom of the basket (you may have to cut it to size like I did).
photo 2 (3)
photo 3 (2)

The Teacup Ornaments

This was my gift for my other grandmother! Another Pinterest idea (obviously!) but there weren’t real instructions so I won’t send a link. I found the teacups on Amazon and they came in a set of 4. I broke one in the trial run, so I ended up with one less for myself.

What You Need
– Teacups
– Porcelain drill bit
– Ribbon
– Bells

Directions
1. You MUST use a porcelain drill bit. Masonry drill bits won’t get you anywhere. I actually broke a drill bit on the trial run! Home Depot or Lowes will definitely have one.

Porcelain Drill Bit

Porcelain Drill Bit

2. Find the center of the cup, and drill. You might want to keep some water running over the area (almost like a wet saw) because the drill bit will get suuper hot. It did take some time, it’s harder than you’d think to drill through the bottom of a teacup.

In process of drilling through

In process of drilling through

All three are ready!

All three are ready!

3. Move onto the ribbon and bell next. Make sure you cut a good amount of ribbon as this is what you’ll use to hang the teacup on the tree. I found rolling the ribbon made it easier to get the bell on.
ornament1
And then tie a knot about 1.5 inches above the bell so that the ribbon doesn’t get pulled up through the hole when it’s on the tree.

Inside view for the knot

Inside view for the knot

4. This part was a little trickier as I tried getting both ends of the ribbon through that super tiny hole you drilled. I just tried folding and rolling the ends together and pushing it through and grabbing the tiny piece that poked through. You have to get both ends through at the same time because it would be seriously impossible to get one through at a time.
5. Once the ends are through, you’ll make a knot and bow. Make sure it’s very tight so it doesn’t come loose!

ornament5
6. And if you want, add a little something to the inside!!

ornament3

The Best Christmas Gift

I think this is one of my favorite gifts I have ever given. My parents are starting the process of building their retirement home in the Poconos, and the house has a distinctly rustic theme. My brother and I were talking about what we were giving the parents for Christmas and we realized there were a lot of “wood” items this year. I found the idea on Pinterest here,  http://dollarstorecrafts.com/2009/07/make-a-rustic-wood-cake-stand/. I bought my cross section on Amazon though because I had some gift card balance left, this is the one I went with:  http://www.amazon.com/gp/product/B000VRYIY6/ref=oh_details_o00_s00_i00?ie=UTF8&psc=1. If you’re going to make this, keep in mind it needs to sit and dry for at least 24-48 hours without being moved.

What you need
– 1 cross section
– 1 log base
– Wood glue and/or silicon
– Polyurethane (with face masks!)
– Sand paper, level, and potentially a circular saw

Directions
1. I went over to my friend’s house since I knew he’d invariably have a log in his wood pile that would work. We made a night of it and I had dinner there with him and his girlfriend, but he also cut the log I chose down to size for me. I chose one that flared out at the bottom because I thought it would be aesthetically nicer. Be careful when cutting the log and try to make the cut as straight as possible to cut down on work later on in the process.
2. My log was not level on the top end and I thought sanding it would be the way to go – turns out it wasn’t. I would have been there for months sanding this down. I called my dad and asked him if he would have time to help me with it when I was back up at their house since I doubted my little Ryobi jigsaw would do the job.

wood
3. Since the difference in height was only about 1/8th of an inch my dad tried using the belt sander first. We worked on it for a while, then took it inside, found a pretty level spot on the downstairs bar, and measured – it was still way off.
4. We used the circular saw next after dad made some marks on the log for where to cut. Two rounds later, we were set.

photo 2-1
5. Now that everything was pretty perfectly level we moved it into the workshop where it would sit for the next couple days. We put beads of silicon around the outer rim of the log and wood glue near the center and positioned the cross section in the right spot.
6. The last step is the polyurethane, this is to protect the wood and food from each other. I got the spray because it said fast drying and I’m impatient, but my dad told me for something this dense you’d want the stuff that comes in a can and basically paint it on.

photo 2

If you use the spray can make sure you wear a face mask so you don’t breathe it in. We followed the directions and did a coat every 1.5-2 hours until the can was empty. We probably did more than the can suggested but it needed a lot of poly.
7. Let dry and enjoy!

photo 3-1

Sorry there’s no “finished” picture – Dad is going to add another coat of poly on the top to ensure it’s coated well.

The Split Second Decision Coffee Table

I have been on a super strict budget of late, and so I haven’t let myself do any projects since I invariably go over my original budget estimate for my projects. However, I have been dying to build something, and this weekend I had no plans whatsoever and couldn’t resist going through my Pinterest ideas. I saw a little pallet coffee table idea and knew I had to do it.

I brought a super old, super scratched up table from my parents house when I moved out and it has worked well – until I painted everything white. It’s a super lacquered-shiny walnut with lots of scratches. I don’t have much space for a store-bought table –  and what fun is that?!

The original table. Too big and the color simply doesn't match the rest of the downstairs.

The original table. Too big and the color simply doesn’t match the rest of the downstairs.

I chose not to follow through on my plans to make this coffee table http://thelocker.typepad.com/the_locker/2012/02/diy-industrial-coffee-table.html which I figured was going to be pretty expensive in the end. I was going to stain it and then distress it with a white top coat – oh man would it have looked good! But alas. I went with this idea http://www.pinterest.com/pin/165085142564372398/ instead.

I reclaimed a pallet from my work’s recycle pile (thanks again!) and brought it home. All I would need is to cut it down to size, sand, buy casters, and a glass top. A super easy weekend project with a great result! On Friday night I went over to hang out with my best friend and he showed me all the pallet projects he’s completed in the couple months that we haven’t seen each other, all commissioned by his wonderful girlfriend. She and I are both too obsessed with Pinterest and pallets. I asked him to come take a look at the one I was going to build the table from since it was still in the bed of my truck as it had weird slats and I wanted his ideas on cutting and sizing. When I explained my thoughts he told me he had a tiny leftover piece from one project that I could take. It turned out to be the perfect size!! I was thrilled! That baby came home with me that night.

I liked the idea of having the top slats overhang, but when I laid it out I saw it was just a bit too big. I was also worried about people scratching their legs on it because I clearly don’t have much walking space. That’s the downfall of having big couches and then moving into a new space. It took so long to figure out how to make things flow downstairs with those. Anyways, I digress.

photo 1

I trimmed the edges down with my jigsaw and then sanded the entire pallet down.

photo 2

A much better size. Small, but functional.

photo 3

Then I went to Home Depot and bought 3 inch casters. I saw online they had pre-cut glass but of course not at my local store. They told my Lowe’s does glass cutting, though, so I headed right over there, got my glass, and giddily headed home.

KB NOTE: This is kind of a dumb thing to admit, but I didn’t expect the glass edges to be SO sharp. Make sure you’re 1. prepared for that fact with gloves (I wasn’t) and 2. prepared for sanding the edges down. We’ll get to that step later.

With everything assembled, I stepped back to admire my table and saw just how ridiculously tiny it was. Seriously, I could go into the little people furniture niche. It’s so short.

WHAT IS THIS?! A TABLE FOR ANTS?!

WHAT IS THIS?! A TABLE FOR ANTS?!

But I told myself not to worry, we’ll just go pick up another pallet and stack them, and voila, a normal size table. Easy solution…or so I thought. I brought home three pallets from the Walmart discard pile (I still don’t know if this was illegal or not. I’m hoping not.) to make sure at least one was going to be right. I measured them all and brought out the table and something was just off. The pallet my friend gave me was definitely not normal. I called him up to see if he had made any modifications to it. Turns out, since he works in HVAC/pipe fitting, a tank for a job came on that pallet so it was not standard size. COOL. So now I have 4 extra pallets that don’t match up and a tiny table. Time to revisit the plans. He suggested I just build legs out of 2x4s but that doesn’t fit my aesthetics for the project! Back to Pinterest.

I couldn’t get the idea of maybe mixing the original pipe table with the pallet so I decided to look at the base for the pipe table again. It really shouldn’t be too hard since it’s just connecting pipes, but I knew I was going run into issues getting custom length pipes. I was also worried about having too many pipes running around and looking bad in contrast to the pallet slats. In the end, and I am so glad I decided to have a long think about the feasibility of the base before going to Home Depot, I decided to go with just the vertical pipes legs, no horizontal pipes or need for anything custom. And thank goodness I didn’t follow their directions! The cost would have been astronomical for my little table. I don’t know if other people have an “in” for where to buy pipes, but they can get expensive at Home Depot. A single flange costs about $10. When I realized I was going to be shelling out at least $80 for the flanges alone, I decided to go with 4 12 inch long, 1/2 inch diameter pipes,  4 flanges, and 4 caps (all 1/2 inch) for the bottom.  I also decided to spray paint the legs silver.

I got home, did the trial run, and ugh. Not what I wanted. It looked like it was up on stilts. And something was missing, which I decided was the silver legs. I didn’t want to paint the pallet, but I needed more cohesion. So I decided the legs needed to be white.

photo-20

Baaaaack to Home Depot. I got everything I needed and came home to do a new trial run.

photo-21

I am much happier. I ended up going with 8 inch long 3/4 inch diameter pipes, and the corresponding diameter flanges and caps. Then I spray painted the legs – make sure you don’t over spray as it will leave paint drips. I had a weird interaction with a neighbor while I was working on the legs and I think he commented that my style looks like that of a single guy…ok? ANYWAYS. Now I needed to move onto the glass edges.

I called a friend of mine who works in construction to see if he had any tools for glass sanding. He gave me a simple tip. Take coarse sandpaper, wrap it around a paint stirrer stick, and sand. I wore gloves just to be careful. I simply laid the glass on top of the pallet, but I probably should look into how to secure the top. For now, since it’s just me in the house it’s not a problem.

glass

Now the edges aren’t soo sharp!

It took me a day and a half to finish this and cost $75 for all the piping, $5 for the glass, and then the pallet was free. It was WAY more expensive than I expected. If my couch was lower I guess the casters could have worked for a cheaper table, but I am quite happy with the result. But way to go sticking to your budget, Kate….

SUPER HAPPY.

SUPER HAPPY.

Update: A friend of mine told me that the table looked weird from this angle and if I hadn’t previously told her there was a glass top it wouldn’t make sense. So here’s an additional picture to illustrate!

final w glass

Mason jar for additional demo
The Cube Cases

These things haunted me.  The pillows are a convex kind of cube where the middle is thicker than the edges, so you had to make sure you cut your fabric in way that it wasn’t too tight in the middle or too loose around the edges. I was not looking forward to them. My mom is really talented with the sewing machine so I called her for advice, and even she said she wasn’t sure what to tell me. Her advice was to go to a fabric store and ask for their professional opinion or go to Joann Fabric and look through their pattterns. I stopped by the sewing section of my Walmart and actually found a cube pattern! It wasn’t exactly what I needed since my pattern was for cases, not a pillow that was going to be stuffed with something like a bean bag – but I could see the way I needed to organize my thoughts and freehand pattern. I also looked up a few patterns on Pinterest for extra research-ammunition. I didn’t use one particular set of directions so I won’t put a link up. Below are my very rough set of directions.

1. With the fabric folded in half lengthwise I laid it out on the floor to see how many pillow cases I could actually make from the topsheet and how much extra fabric I was going to have to buy. It came out that I was able to get a top and bottom for all four pillows. I figured this out by first just lying them all down on the fabric with about an inch or two between them.

2. Then I measured the length and width of the pillow, added an inch to both, and marked up the fabric. I kept it folded in half with the back of the fabric facing up while I made the marks to reduce effort. I had 8 big pieces for the tops and bottoms.

fabric1

3. With the leftover fabric I cut out the side pieces. When I assembled the first case I realized I had measured too much fabric for the sides, so I probably could have gotten away with making all of the sides out of the topsheet instead of buying extra fabric like I did, but you live and learn. What I did wrong was over measure the sides based off the thickest point of the pillow. If I had measured the thinner edges I would have been set. After I finished the first pillow (where I had to pin half of the side fabric down when I stitched on the bottom) I cut off a little more than half of the rest of the side panels. With all those pieces cut out I had 16 pieces for the side panels.

You can see the pillow in this one to get an idea why it's a weird shaped case.

You can see the pillow in this one to get an idea why it’s a weird shaped case.

4. The first step of stitching was to sew the side panels for the first pillow into a loop. Edge by edge with the “back” or “wrong side” facing you, stich them together with about a 1/2 inch seam allowance on the sides.

No worries, Lep, you just do you.

5. With your loop ready, pin the top piece to it with everything still wrong-side out. I preferred to start pinning at the middle since all my edges are pretty rough and not symetical.

photo_1

Pinned

Stitched

Stitched

None of the corners turned out pretty, but these are outdoor pillows anyways. For your stitching start in one corner of the pillow and get as close to the seam on the opposite side as you can. Once you’re close, ensure the needle is in the fabric and lift up the foot. Rotate the fabric so that you’re now going straight down the next edge instead of a weird crooked turn. When I saw that I actually had something that looked like a viable pillow case I started to get excited. I put it on the pillow to see and OMG it was working!! There was too much side panel fabric as you can see below, but who cares! I was super proud and couldn’t wait to get the rest done.

The trial run with the first case, you can see how much extra side panel fabric there is here.

The trial run with the first case, you can see how much extra side panel fabric there is here.

6. Another reason why this was going to be such an undertaking was because these cases also had to be envelope style to get the pillows in! I decided to just not care for the backs. I cut the bottom piece of fabric in half, and on the “inner” cuts that I just made I sewed about a half inch seam on each. Then I overlapped them and sewed them together about two inches on the top and bottom. I pinned the middle of them together so the envelope wouldn’t open up and make sewing the bottom on harder.

fold1

fold2

7. I followed the same process as step 5 for the bottom piece as well. The pinning the top and bottom to the side panels takes the longest, but you want to make sure it’s right. And then you’re done!!

8. The last thing you have to do is stuff in your pillow!!

full1

full2

I had a friend staying at my house and crashing on my couch while I was making these and I don’t think he’ll ever see someone as excited over a pillowcase as I was over the first one. I was so uber proud. I hugged the pillow in front of him, even. He did tell me that he felt like I should be watching Golden Girls as I sat at my kitchen table with my sewing machine and cat sleeping right in front of the machine lol

I’m now much more ready to begin my sewing projects that I felt too inexperienced to start. Sure these are just pillowcases but who cares! Bring it on!