The Skinny Orange Chicken

One thing that has taken a dramatic upturn is my cooking. Usually for dinner I ate a head of lettuce with some chicken and balsamic and oil…like almost every night. I love it! But that’s not going to fill a grown man, nor would he appreciate eating every single day. I have been all over Pinterest grabbing recipes, and this one made it to my cookbook for saving! I found it here: http://addapinch.com/cooking/skinny-orange-chicken-recipe/#axzz2pfHUD34V

Skinny Orange Chicken
Ingredients

4 skinless, boneless chicken breasts, cut into bite-sized pieces
1 tablespoon coconut oil or olive oil
¼ cup chicken stock
3 tablespoons honey or maple syrup
2 cloves garlic, minced
1 tablespoon orange zest
¼ cup fresh orange juice
¼ cup soy sauce
1½ teaspoons Sriracha sauce
¼ teaspoon ground ginger
1 pinch red pepper flakes
1 teaspoon sesame seeds for garnish, optional
Broccoli

Instructions
1. Melt coconut oil in medium skillet over medium heat. Add in chicken pieces and cook until cooked through and browned, about 8-10 minutes. Remove from skillet and set aside.
2. While chicken is cooking, stir together chicken stock, honey or maple syrup, garlic, orange zest, orange juice, soy sauce, Sriracha sauce, ginger and red pepper flakes. 3. Pour into heated skillet once chicken has been removed and reduce to low heat.
4. Cook, stirring often, until sauce has been reduced and coats the back of a wooden spoon. Remove from heat and pour over chicken.
IMG_1084
5. To serve, spoon chicken over a bed of broccoli and then spoon on additional sauce. Top with sesame seeds, if desired.
IMG_1195

If your sauce does not thicken as desired, you may add the following to assist in the thickening: mix 1 – 2 teaspoons of cornstarch with the same amount of water to form a paste. Stir into the sauce well to thicken.

The Entertainment Center

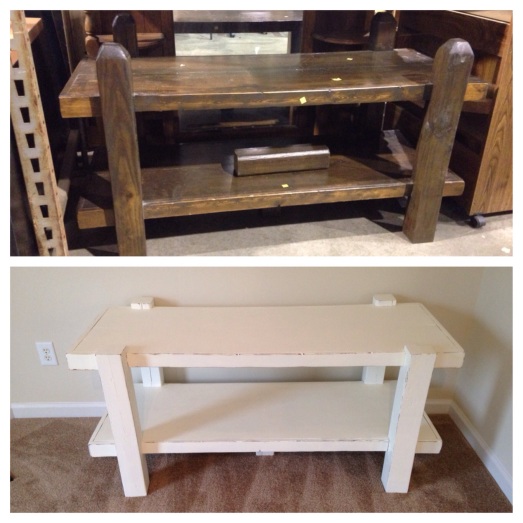
We had some very big purchases we had to make for the new place (couches, washer dryer, mattress..) and buying a big entertainment center was not in the budget. We went to the home of some friends one night for some drinks and I lOvEd the way they decorated their home. Their entertainment center was exactly what we needed in our space, and they mentioned they had gotten it at the Habitat for Humanity Restore, which I’d never heard of before! So I looked it up online and there is one not 10 minutes away! I love Raleigh <3. So I popped over and found a big beast that I knew could be turned into a beauty. It was only $35, too! So I hauled it home and it cluttered up my teeny tiny townhouse for weeks until we brought it out to my boyfriend’s house and did the work in his garage.

At the store!

At the store!

1. The first thing I did was cut off the awful turret like stumps. This was difficult because we only had a small jigsaw. A longer blade Sawzall would have been much better, but we don’t have one…yet! 😉 I had to cut around the edges and jiggle things along to get in. This resulted in uneven cuts on the stumps.
2. Since the stump tops weren’t level I had to break out the belt sander. I tried with the palm sander but that was VERY slow going. I sanded until it looked level and then my boyfriend’s best friend checked it and it was pretty much spot on. I’m awesome, don’t worry.
3. Then I switched back to the palm sander and got going on the surfaces of the table. It didn’t need to be perfect as I knew my Zinsser 1-2-3 primer/sealer would be great. I used that on the table and chairs I did so I knew it would cover everything. I went through 2 cans of the spray paint cover.

Sanded

Sanded

Primed

Primed

4. I painted it with some leftover paint I had from when I previously refurbished my dresser, I used a small roller I had and some tiny brushes for the crevices.
5. Then I went out and bought some sanding blocks to distress it. I bought medium so I didn’t totally ruin it, but that was a mistake. I should have done more research, maybe I should have used steel wool, because it was super tedious and difficult and I gave up after only distressing the edges.

IMG_0969.JPG
6. We needed to poly it since it would have a bunch of equipment on it. Unfortunately, the poly we used turned it yellow in some places! That was a huge bummer after all the work! But it wasn’t bad and we were lucky it was mostly yellow on the back.
 

BONUS PICS!
While I was working on the entertainment center my man was working on the headboard he built for me! He did everything himself!

Sanding!

Sanding!

Stained!

Stained!

Final beautiful product, complete with kitty :)

Final beautiful product, complete with kitty 🙂

The Pine Cone Method

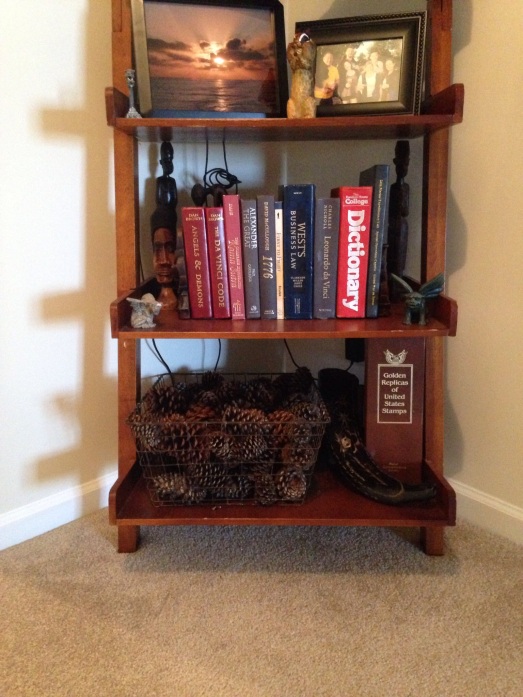
Hi everyone! Sorry for the long delay!! It’s been a pretty crazy few months. My Marine is no longer my Marine, he’s now my civilian! And he’s also my roommate! We moved in together a few weeks ago and have been crazy with making the place our own. One of the items on my never-ending list of things to do to get this place complete is to fill a wire basket on a tiered shelf in our hallway with pinecones! I bought some scented ones but 1. They can be expensive and 2. He didn’t want to be living in a house that smelled overbearingly of cinnamon so I decided to mix the scented pinecones with some I found out in the forest near our house and spray paint them gold for a nice effect. Cheap and effective! So we went out with my new fur baby, his little wirey haired dauschund, Alfie. We picked up a bunch of pine cones, but we’ve had a lot of rain over the past week so they were very wet. When I got home I followed the following instructions.

Directions
1. Collect your pine cones.
2. Preheat the oven to 200 degrees.
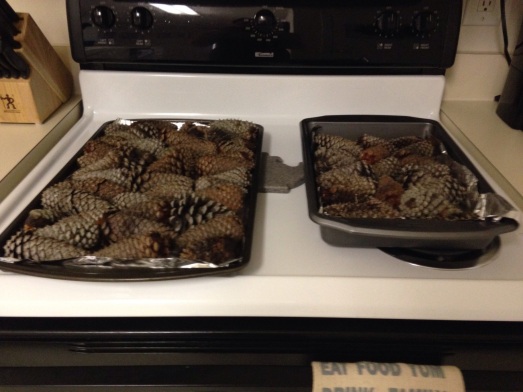
3. Arrange the cones on a baking sheet in a single layer, don’t overcrowd if the cones are very wet or tightly closed.

IMG_1126-0.JPG
3. Bake the cones for 20-25 minutes really just bake them until they are open. For me it took like 80 minutes for them to open! The wet-er they are the tighter the pine cones close, so it will take longer.
4. After they’re open and done baking it’s good to spray them with some clear coat spray paint to give them some support as they’re pretty fragile.

IMG_1154.JPG